
![]()
- Wildlife Habitat Maintenance
- Wildlife Habitat Resources
- Create an Edible Garden
- Outdoor Learning Resource Folder
(Google Drive)

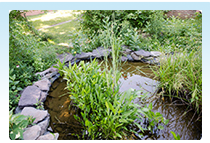
Creating a Wildlife Habitat at Your School

Your team will work together to plan, create, and use the garden you create.
-
Who should be included? Successful teams represent the different groups that may use or be impacted by the garden. Recommended team members include students, teachers, administrators, custodians, parents, volunteers, and other community members.
-
What should our team do? Brainstorm and discuss ideas and goals for your garden.

Once your team has discussed ideas and goals for your garden, it’s time to start planning and designing.
-
Conduct an audit/site survey of school grounds. Look at characteristics such as sunlight, water flow and drainage, accessibility, and how surrounding areas are being used. These assessments are critical in choosing a location for your garden and the types of plants and other garden elements that will thrive in your chosen location. Make sure a water spigot is located nearby.
Eco-Schools Schoolyard Habitats Audit
Eco-Schools Biodiversity Audit
USFWS Schoolyard Habitat Project Guide - Field Notes for Site Survey
Your garden must be at least four feet away from an air intake. It is recommended that your garden be in an accessible area.
-
Conduct a soil test of the possible locations you identify. A soil test will determine the pH and nutrient levels in your soil and allow recommendations to be made to correct any issues. If you are planting in raised beds where you are adding your own soil, a soil test is not necessary. Soil test kits cost $10 and are available at any Fairfax County Public Library. Follow the kit instructions to complete your testing before sending the kit to Virginia Tech’s Soil Testing Lab.
-
Create an action plan and design for your garden based on your goals and the results of your audit/site survey.
-
Only plants native to Virginia should be planted in your habitat unless you are intermixing edibles. Absolutely no invasive species may be planted in your habitat. Learn more about invasive species from Fairfax County Park Authority.
-
Certain garden supplies must be purchased from a list of FCPS-approved garden items. Find options for approved rain barrels, benches, picnic tables, raised beds, and compost bins here.
-
In your plans, make sure to allocate enough time and effort towards garden preparation tasks such as weeding, leveling soil, assembling raised beds, and making signage.
-
Your action plan must include a maintenance plan outlining the long-term care of the habitat (5+ years).
-
Consider placing some kind of edging around the habitat space to clearly designate your habitat as a no-mow area.
-
Remember to include supplies, signs, edging material, and other supplies in addition to the plants you purchase for your garden.

Once you have a location selected for your garden, you will need to get site approval. It is a good idea to have multiple possible locations to propose.
-
Submit a DC-407 to get your garden site approved by Facilities. Someone in your front office is trained to use the DC-407 system. Include Get2Green, the proposed location, funding source, and a point of contact in the description field.
-
Example: Get2Green project. Want to plant a native habitat with students. Have funding from a grant. Only seeking site approval so we can begin implementing project. Proposed location is between doors 7 and 8 near the trailers. Point of contact for this project is Captain Planet - [email protected]. Please let us know if this location is okay.
-
Call Miss Utility. Before you dig, call Miss Utility to ensure no utility lines are buried in your proposed site.
-
FCPS Utility Check. Put in a FCPS work order to get your site checked for FCPS utility lines.


You have your garden design - now it’s time to fund it.
-
Create a budget for plants, tools, seating, labor costs, signs, and other materials.
-
View a few sample budgets.
-
-
Certain garden supplies must be purchased from a list of FCPS-approved items.
-
Find options for approved rain barrels, benches, picnic tables, raised beds, and compost bins here
-
Grants are one of the best ways to fund your garden. Find a grant writing guide, templates, and info on finding grant opportunities in the Funding/Grants Resource Folder.
-
Fundraisers and donations can also be successful in raising funding for your garden.

You have your design, approval, and budget. It’s time to buy everything you need to bring your garden to life.
-
Where to buy plants
-
Earth Sangha in Springfield, VA and Nature by Design in Alexandria, VA both sell exclusively native plants.
-
To find other nurseries that sell native plants, check the Plant NoVA Natives website.
-
Mulch – Facilities will deliver up to two loads of mulch to your school each school year. Just put in a work order requesting the mulch. If you are getting mulch elsewhere, be very cautious about the contents. Some mulch contains seeds for invasive and unruly plants that will take over your garden.
-
If you are planting in an interior courtyard, bagged mulch may be easiest to transport.
-
Signs – A habitat doesn’t always look like a habitat – that’s why signs are helpful. Consider placing a larger educational sign about your habitat, informational signs about the different plant species, and no-mow zone signs in English and Spanish.
-
Smart Garden Signs – Smart Garden Signs has pre-designed signs for a variety of native plants and other garden features. You can also create custom signs.
-
Remember: Certain garden items must be purchased from the approved items list! If your plan includes rain barrels, benches, picnic tables, raised beds, or compost bins - make sure you’re buying an item on this list.

Get your location ready and prepare to put plants in the ground!
-
Read Get2Green’s Planting Day Tips to help you host a successful planting day.
-
Preparing your site for planting (eliminating weeds, preparing soil, etc.)
-
Recruit volunteers – advertise in your school newsletter and social media. Create a Signup Genius form to schedule volunteers. Consider reaching out to other schools in your pyramid to offer the opportunity to students for service learning.

Your garden isn’t finished when the plants are in the ground. Maintaining your garden is important to keeping it healthy and beautiful for years to come.
- Maintenance schedule/timeline
- Maintenance guides and a seasonal maintenance timeline can be found in the Wildlife Habitat Maintenance Resource Folder.
- If you have a rain barrel, you need to winterize it before the first freeze. See the rain barrel fact sheet and how to winterize your rain barrel for more information.
- Maintenance of a school garden is up to the school and is not the responsibility of the Office of Facilities Management.
- Use volunteers to help maintain your garden. Have a garden cleanup day and invite the school community to help. Reach out to nearby businesses and places of worship for volunteers. Contact scout troops for assistance.
- Having families adopt the garden for one week over the summer helps to ensure plants don’t wilt in the summer heat. You can make online volunteer sign-up forms at sites such as SignUp Genius to allow families to choose a week to adopt the garden.

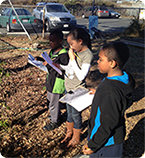
So much hard work has gone into your garden - don’t forget to take the time to use it and enjoy it. It’s an outdoor classroom space!
-
Find resources for using your garden in the Wildlife Habitat Resources page, Outdoor Learning Resource Folder, and under the Learning Outside section of the Outdoor Learning menu.